

Customizing your workspace in Sibelius Ultimate can dramatically improve your workflow and efficiency. In this post, I’ll walk you through some essential steps, including setting Invisibles, adjusting preferences, creating custom shortcuts, and saving specific panel layouts. By the end, you’ll have a workspace tailored to your needs, along with practical tips to help you optimize your experience. For even more insights, check out my YouTube channel for in-depth tutorials.
1. Setting Invisibles
Start by navigating to the View tab and selecting Invisibles. This feature allows you to display important elements like: 
- Layout Marks: These show any adjustments made to the score layout.
- Bar Numbers: These display the bar numbers and corresponding instruments.
Remember, these markings won’t print with your score—they are purely for your reference. If you need to hide them temporarily, simply click Hide All.
2. Adjusting Preferences for Default Settings
If you want your customized Invisibles settings to appear every time you open a new score, follow these steps:
- Open Preferences:
- Mac: Sibelius > Preferences or use the shortcut Command + Comma.
- Windows: File > Preferences or use Control + Comma.
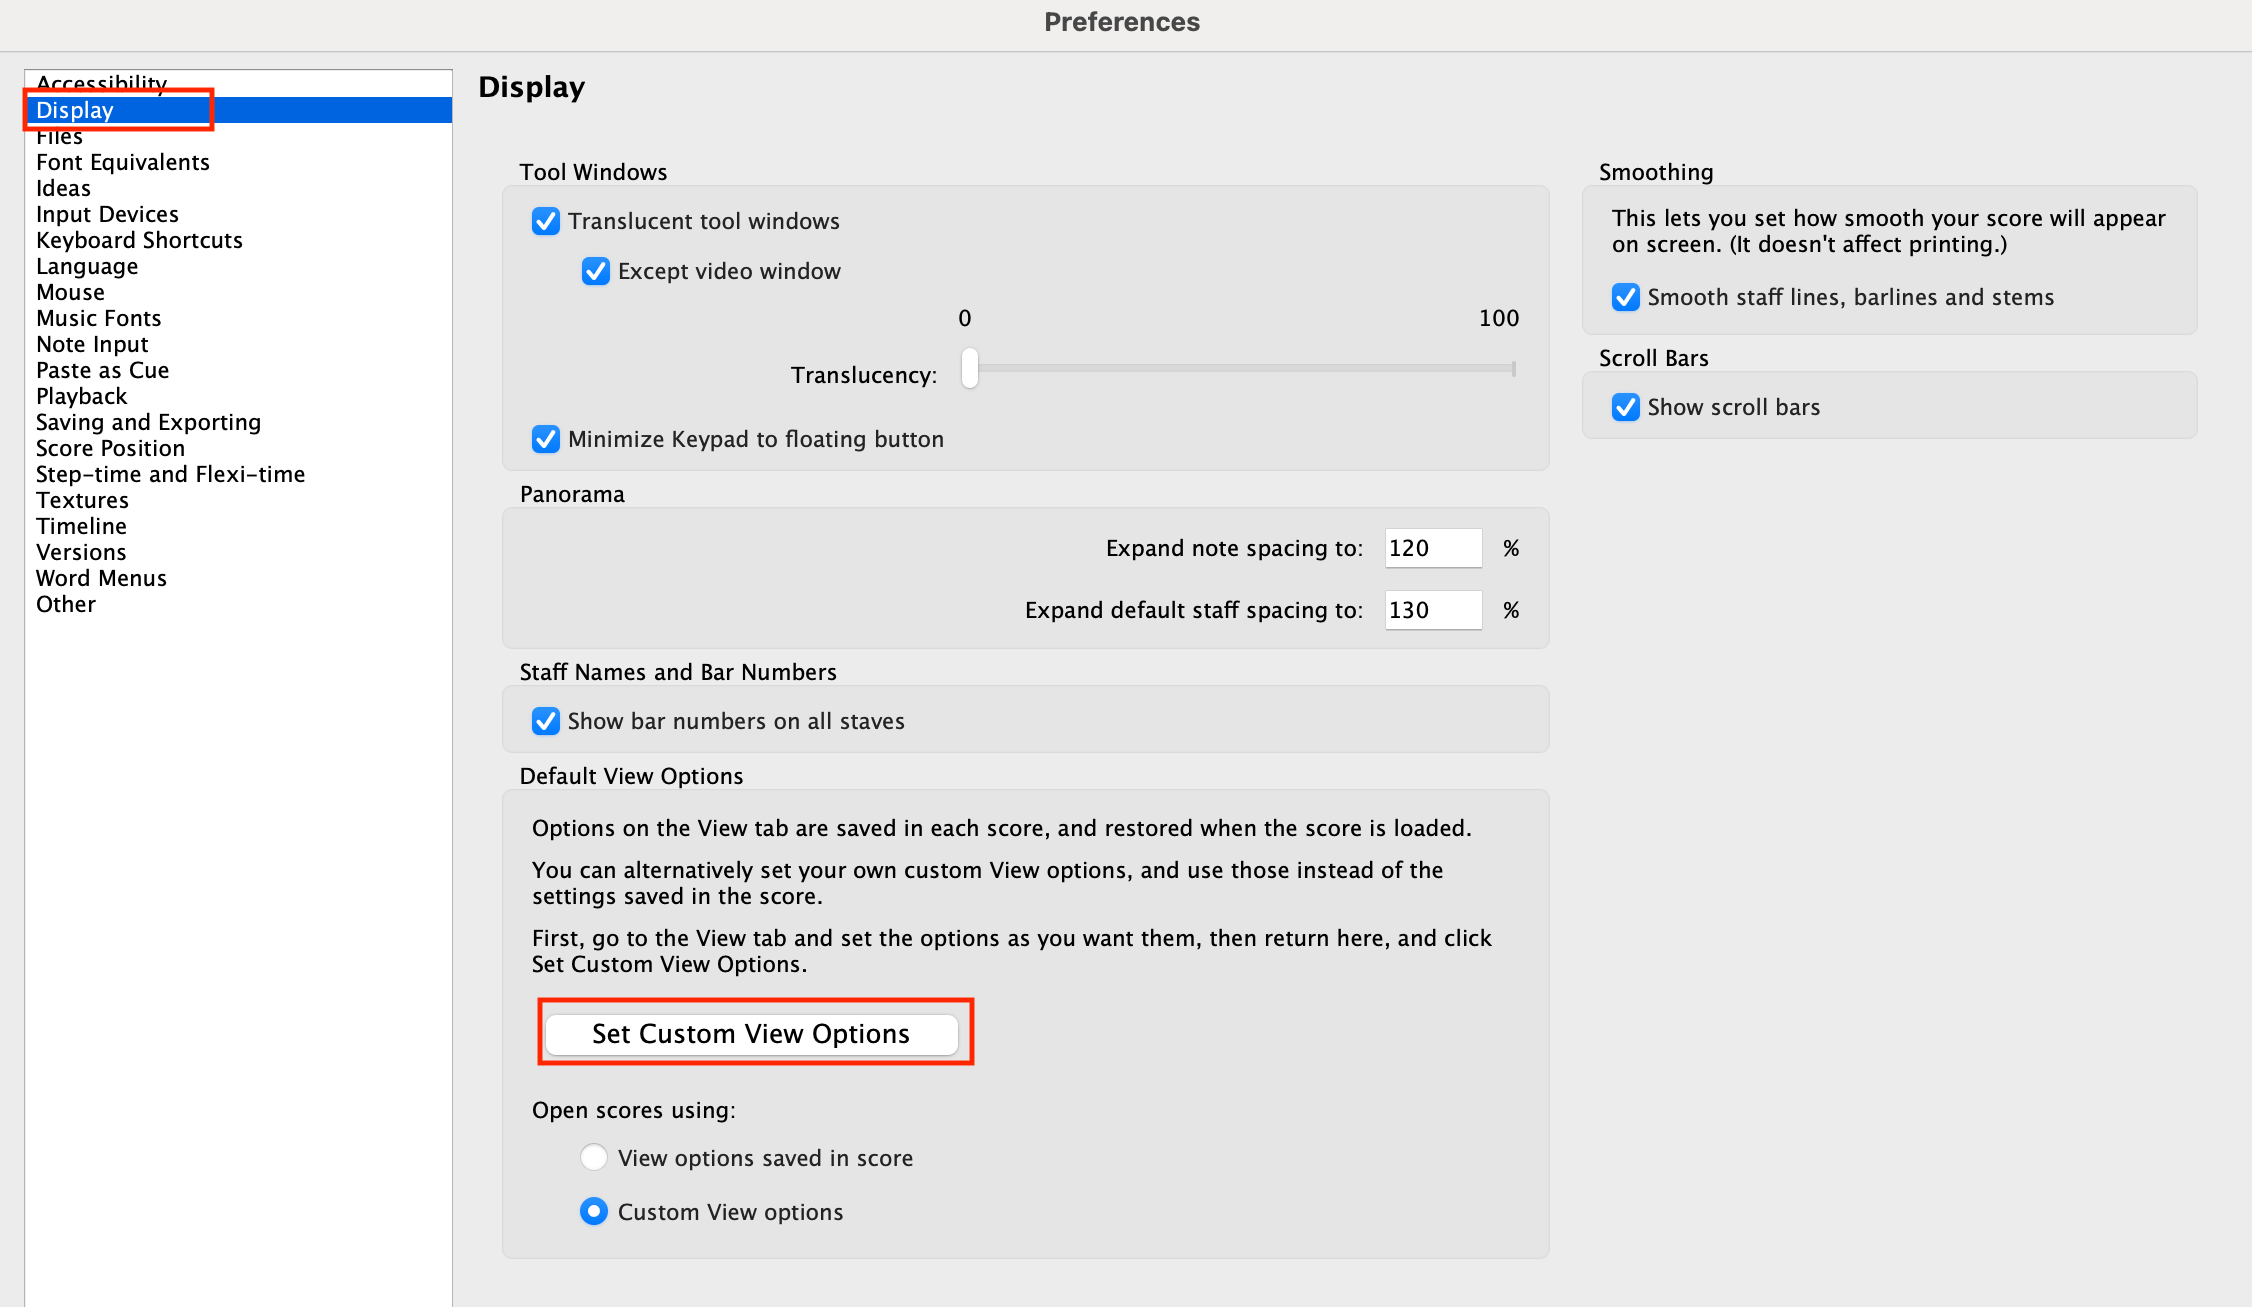
- In the left column, select Display.
- Under Default View Options, click Set Custom View Options.
- Click OK to save your settings.
Now, any new score you create will automatically use these custom view settings.
3. Creating a Shortcut for Hide All
The Hide All option is useful for quickly decluttering your workspace. While there’s no default shortcut for this feature, you can easily create one:
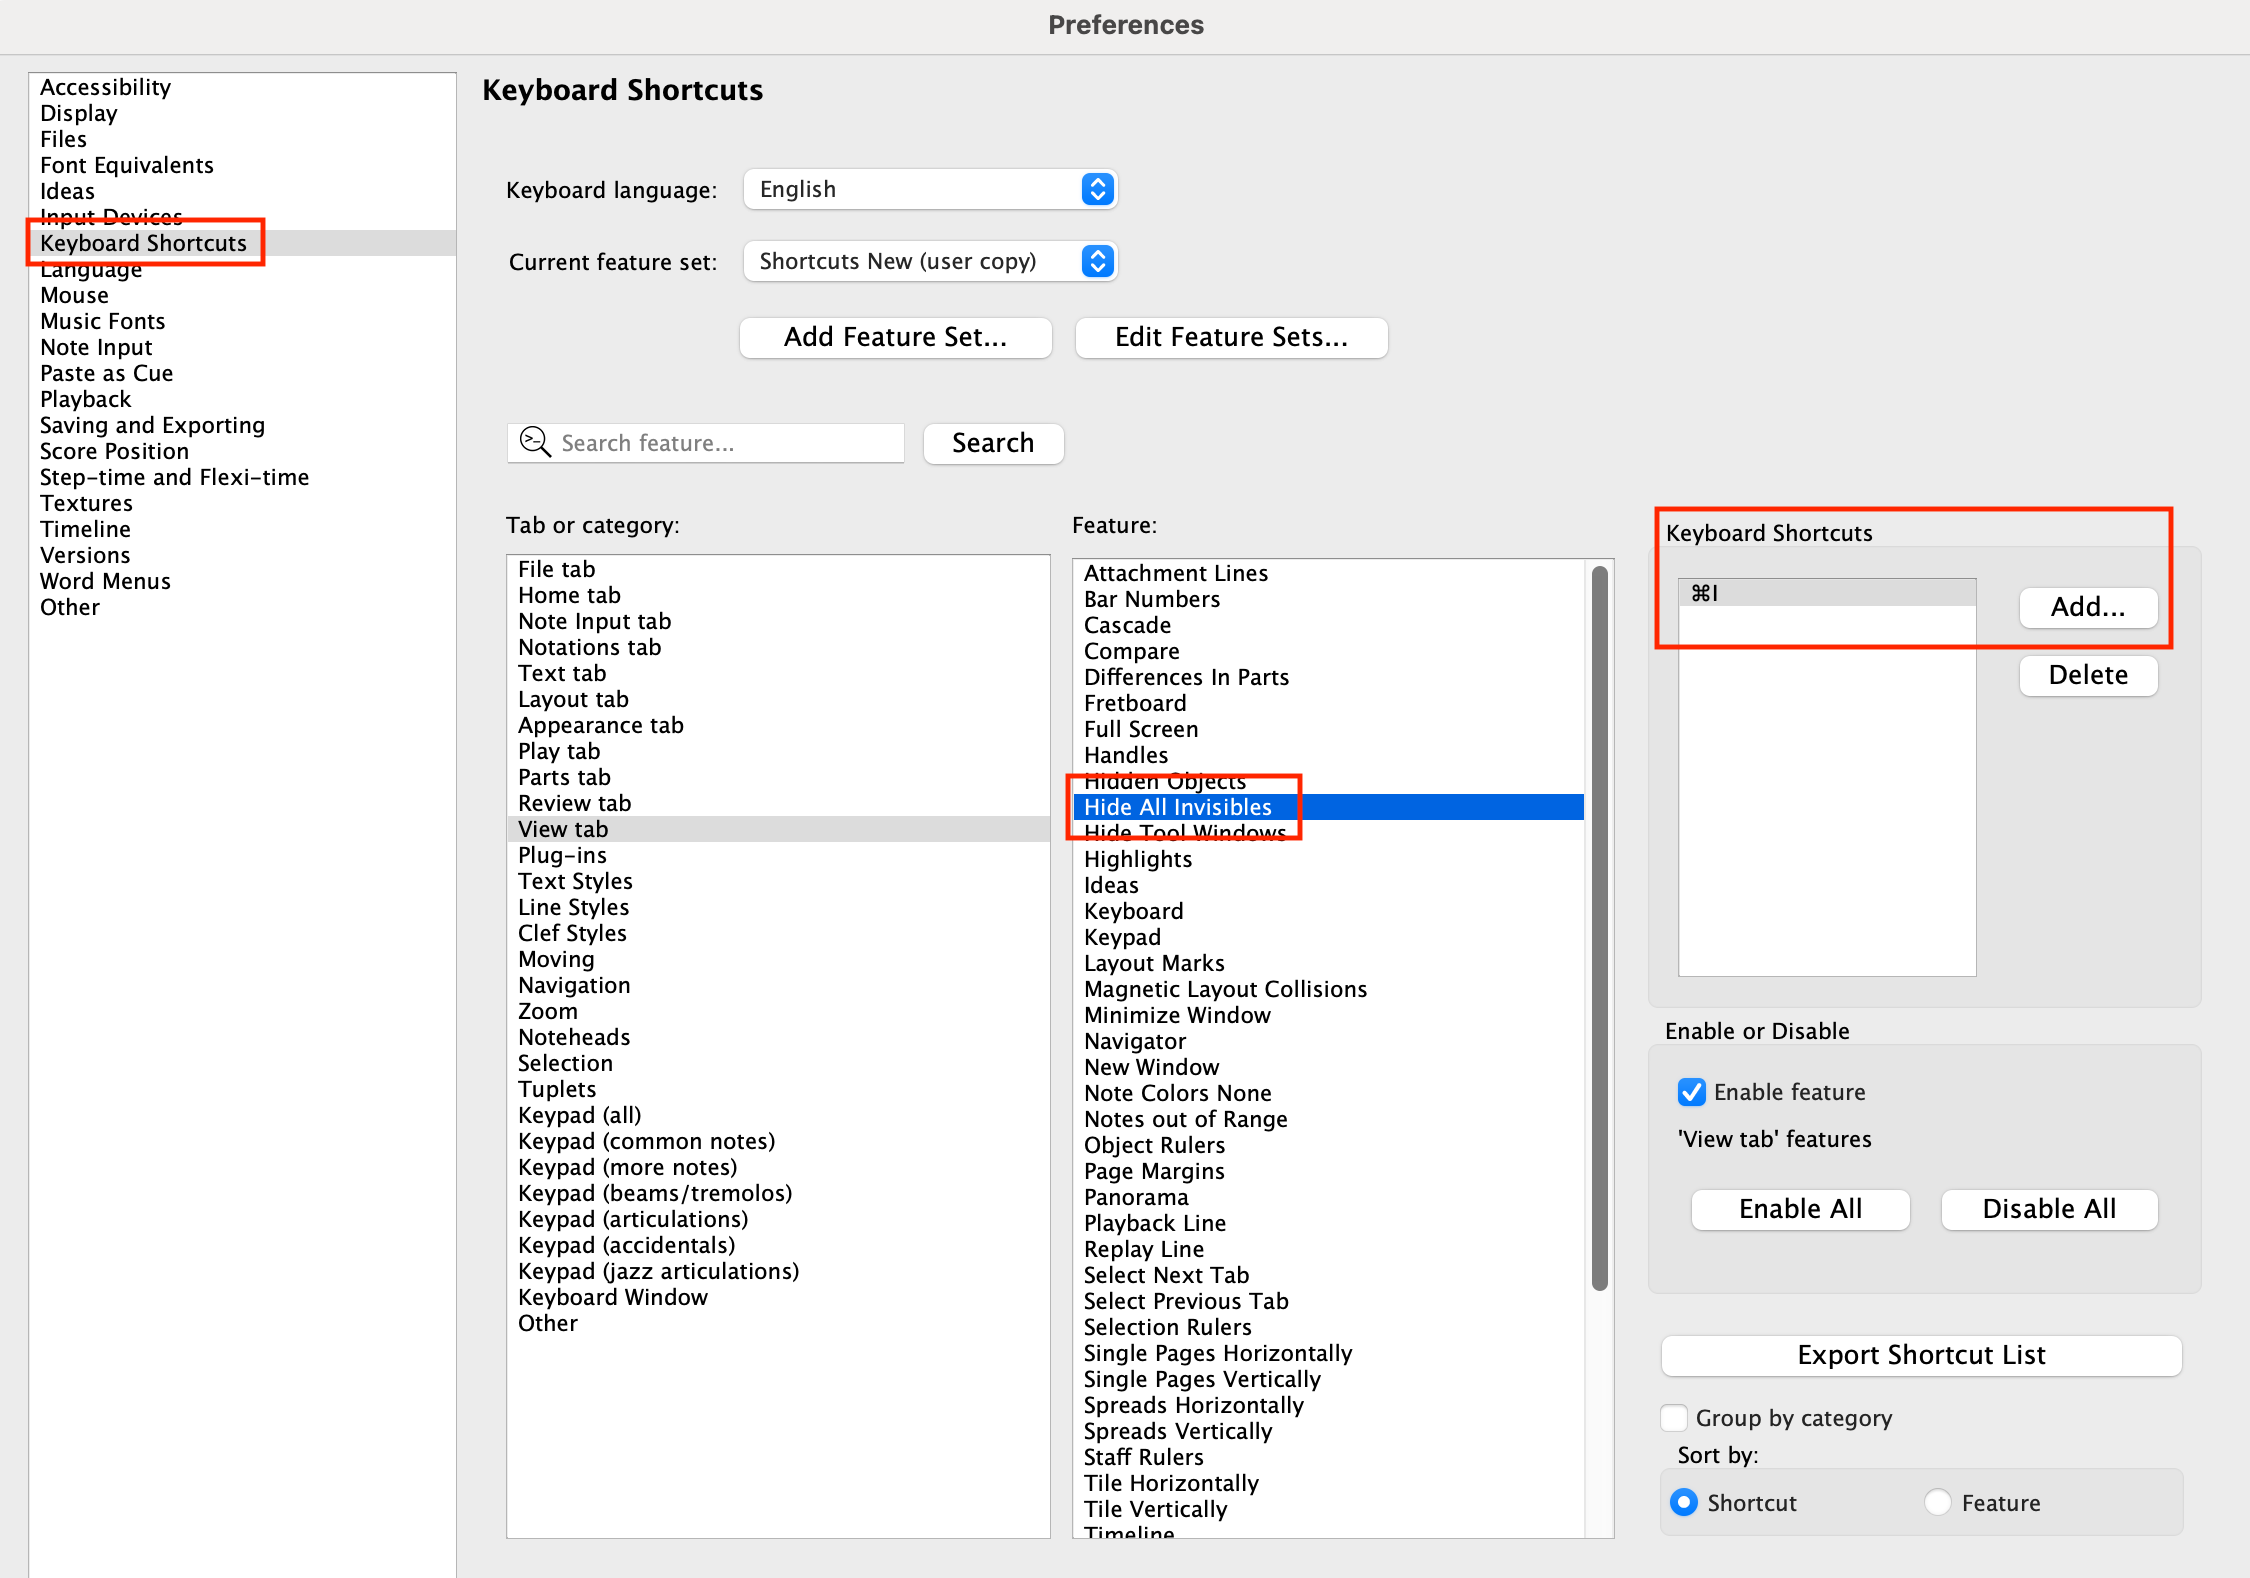
- Open Preferences > Keyboard Shortcuts.
- In the search bar, type Hide All and click Search.
- Select the Hide All Invisibles item.
- If this is your first custom shortcut, click Add and create a new shortcut set (e.g., “Shortcuts New”).
- Assign a shortcut (e.g., Command + I on Mac or Control + I on Windows) and click OK.
You can now toggle the Hide All option with your new shortcut.
4. Setting and Saving Panel Layouts
To display specific panels in your workspace:
- Go to View > Panels and enable the panels you frequently use, such as:
- Transport: A floating toolbar for playback controls.
- Timeline: A visual overview to quickly jump to specific bars or sections.

However, these settings aren’t saved as preferences by default. To save them:
- Open Preferences and go to Files.
- At the bottom of the window, check Set Custom Size and Position.
- Arrange your panels and window size as desired, then click OK.

When you create a new score using Command + N (Mac) or Control + N (Windows), your custom panel layout will be retained.
5. Making Future Changes
If you decide to adjust your layout later, the process is simple:
- Go to File > Preferences and select Files.
- Scroll down to Set Custom Size and Position.
- Rearrange your panels or window size, then click OK.
For instance, if you no longer want the Timeline displayed in every score, you can update your preferences and save the new layout.
Click the link below to view my YouTube video demonstrating the above steps.
If you found this blog helpful, please share it with others. And if you’d like more tips, subscribe to my blog or visit my YouTube channel for tutorials.
