
Introduction
Entering lyrics into music notation software can be time-consuming, but AI can significantly speed up the process. Whether you’re working with your own lyrics or inputting text from a published song, AI tools like ChatGPT, Google Gemini, or Microsoft Copilot can assist with breaking lyrics into syllables, checking grammar and spelling, and formatting text efficiently.
In this guide, I’ll walk you through how to use AI to quickly enter lyrics into Dorico, using Battle Hymn of the Republic as an example.
See the video at the bottom of this blog post for a step-by-step walk-through.
Step 1: Preparing Your Lyrics
If you’re working with existing lyrics, start by finding a reliable source. I searched Google for Battle Hymn of the Republic lyrics. The first link in the list was a website with the lyrics for the song.
If you’re using your own lyrics, you can copy them from a document such as Word or a Google Doc.
To copy the lyrics:
- Select the lyrics
- Right-click and select Copy, or
- Use Ctrl + C (Windows) or Command + C (Mac).
Once you have the lyrics copied, you’re ready to use AI for syllable breaking.
Step 2: Using AI to Break Lyrics into Syllables
Login to your AI tool of choice—I’m using ChatGPT. Paste the lyrics into the AI using Ctrl + V (Windows) or Command + V (Mac).
In the prompt area, add a simple prompt like:
“Break these lyrics into syllables.”
The AI will automatically insert dashes to indicate syllable breaks, saving you the time of doing it manually. If you’re working with original lyrics, you can also ask AI to check grammar and spelling before creating syllable breaks.

Step 3: Adding a Dashed Slur and Entering Verse 1 Lyrics
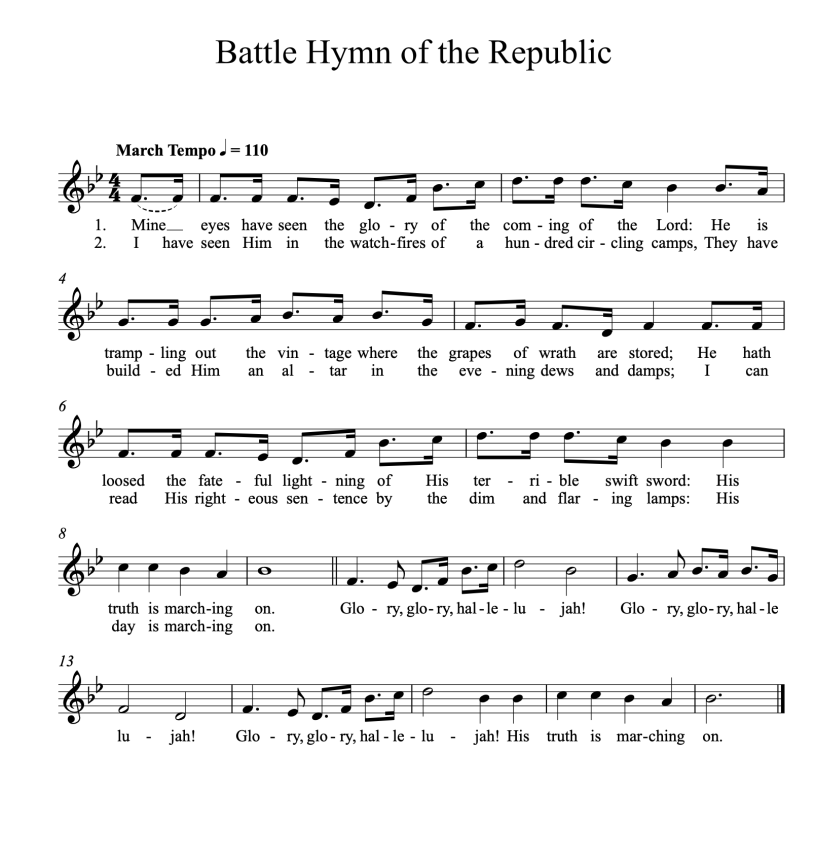
Before entering lyrics, ensure the notation is fully set up. If your piece contains slurs or melismas, add the slurs in. In my example, I needed to indicate a special slur (dashed slur) for the first bar since verse 2 needed two notes while verse one only needed one.
To add the dashed slur:
- Select the note.
- Press S to add a slur.
- Press Command + 8 (Mac) Ctrl + 8 (Win) to open the lower panel.
- Choose Dashed Slur from the settings.

Now, it’s time to enter the lyrics.
Opening the Lyric Popover
- Select the first note.
- Open the Lyric Popover using Shift + L.
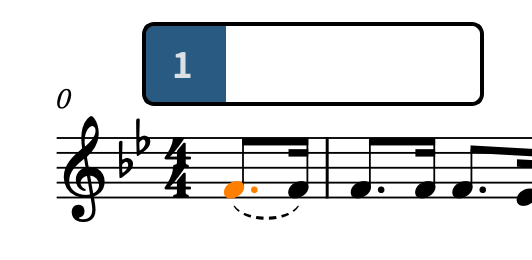
- You can also select it by going to the right panel, click Popovers, and select Lyrics.
By default, Dorico assigns lyrics to verse 1, so no additional adjustments are needed at this point.
Pasting the Lyrics
With the Lyric Popover open, paste each lyric using:
- Command + V (Mac)
- Ctrl + V (Windows)
Dorico automatically spaces the lyrics, adjusting the notation as needed. If your lyrics span multiple notes, press the Spacebar after a word to advance to the next note.
Adding Additional Verses
For verse 2, repeat the steps above:
- Copy verse 2 from the AI with the lyrics and syllable breaks.
- Go back to Dorico and select the first note
- Press Shift + L to open the Lyric Popover.
- Press the down arrow to switch to Verse 2 mode.
- Use Ctrl + V / Command + V for each pickup note, then continue through the passage.
TIP: If your song has complex lyrics (e.g., different syllable placements per verse), you may need to manually adjust some entries.
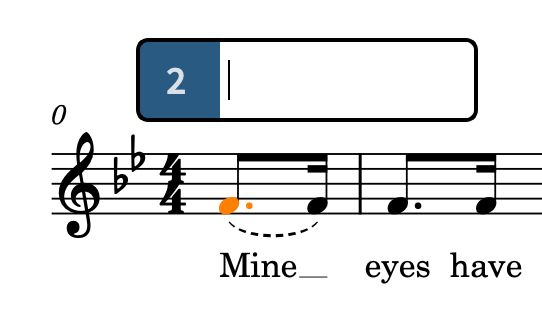
Step 4: Entering the Chorus
Chorus lyrics are usually centered and italicized. To format the chorus:
- Select the first note of the chorus.
- Open the Lyric Popover (Shift + L).
- Press the up arrow to switch to the Chorus mode (indicated by the letter “C”).
- Paste the lyrics in one at a time (Command + V / Ctrl + V).
Dorico will automatically adjust spacing and formatting. 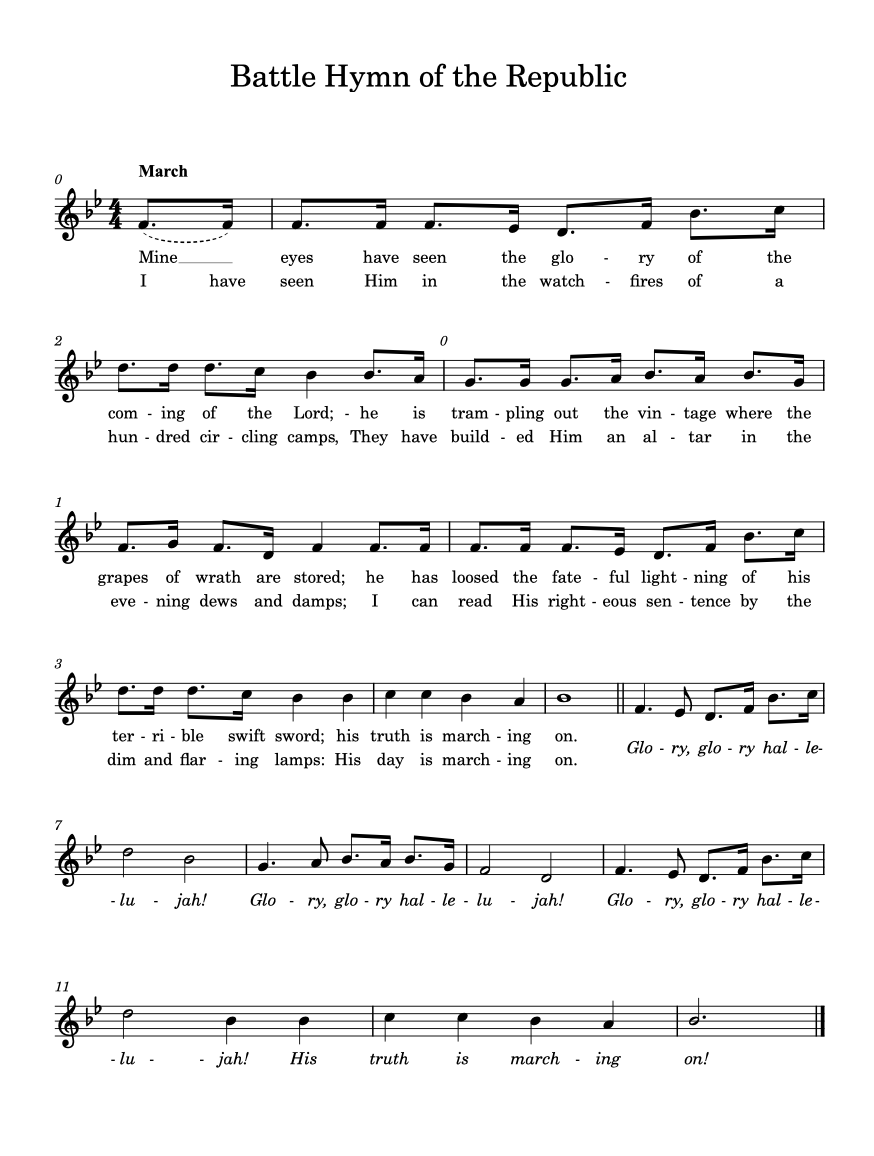
Step 5: Adding Verse Numbers
To automatically number the verses:
- Go to Engraving Options.
- Under Lyrics, enable Show Verse Numbers.
- Click Apply and Close.


Final Thoughts
Using AI to assist with lyric entry can save significant time, especially when working with multi-verse pieces. In this workflow:
✅ AI handled syllable division automatically.
✅ Dorico adjusted lyric spacing dynamically.
If you found this blog helpful, like and subscribe to our channel for more music notation tips!
