

Drum set notation can be confusing when first working with percussion in Dorico, especially when entering open hi-hat, closed hi-hat, and pedal hi-hat. Once you understand how Dorico organizes percussion instruments and how playing techniques control sounds, the process becomes straightforward.
This post explains how to enter open hi-hat, closed hi-hat, and pedal hi-hat in Dorico. These steps work in all versions of the software:
• Dorico SE
• Dorico Elements
• Dorico Pro
A full video demonstration of the process is included at the bottom of this post.
Understanding Standard Drum Set Notation
Before entering notation in Dorico, it is helpful to look at standard drum set notation. A commonly used reference is The Guide to Standardized Drum Set Notation by Norman Weinberg.
• The hi-hat can be played with sticks or with the foot pedal
• The hi-hat played with sticks appears above the staff using X noteheads
• The pedal hi-hat appears below the staff
• An open hi-hat is indicated with a small circle above the note
Closed hi-hat notes are often marked with a plus sign, although this is optional. Most drummers assume that hi-hat notes are closed unless an open symbol appears. The plus sign is therefore usually used only as a visual reference.
Adding a Drum Set in Dorico
To begin entering drum notation, first create a new project or add a drum set to an existing project.
- Open Setup mode
- If the Players panel is not visible, click the disclosure arrow
- Click Add Single Player
- Type drum in the instrument search
You will see two options:
• Drum Set Basic
• Drum Set Full
Drum Set Basic contains the standard drum kit instruments that most scores require.
Drum Set Full includes additional toms and auxiliary percussion.
In most situations, Drum Set Basic is sufficient. 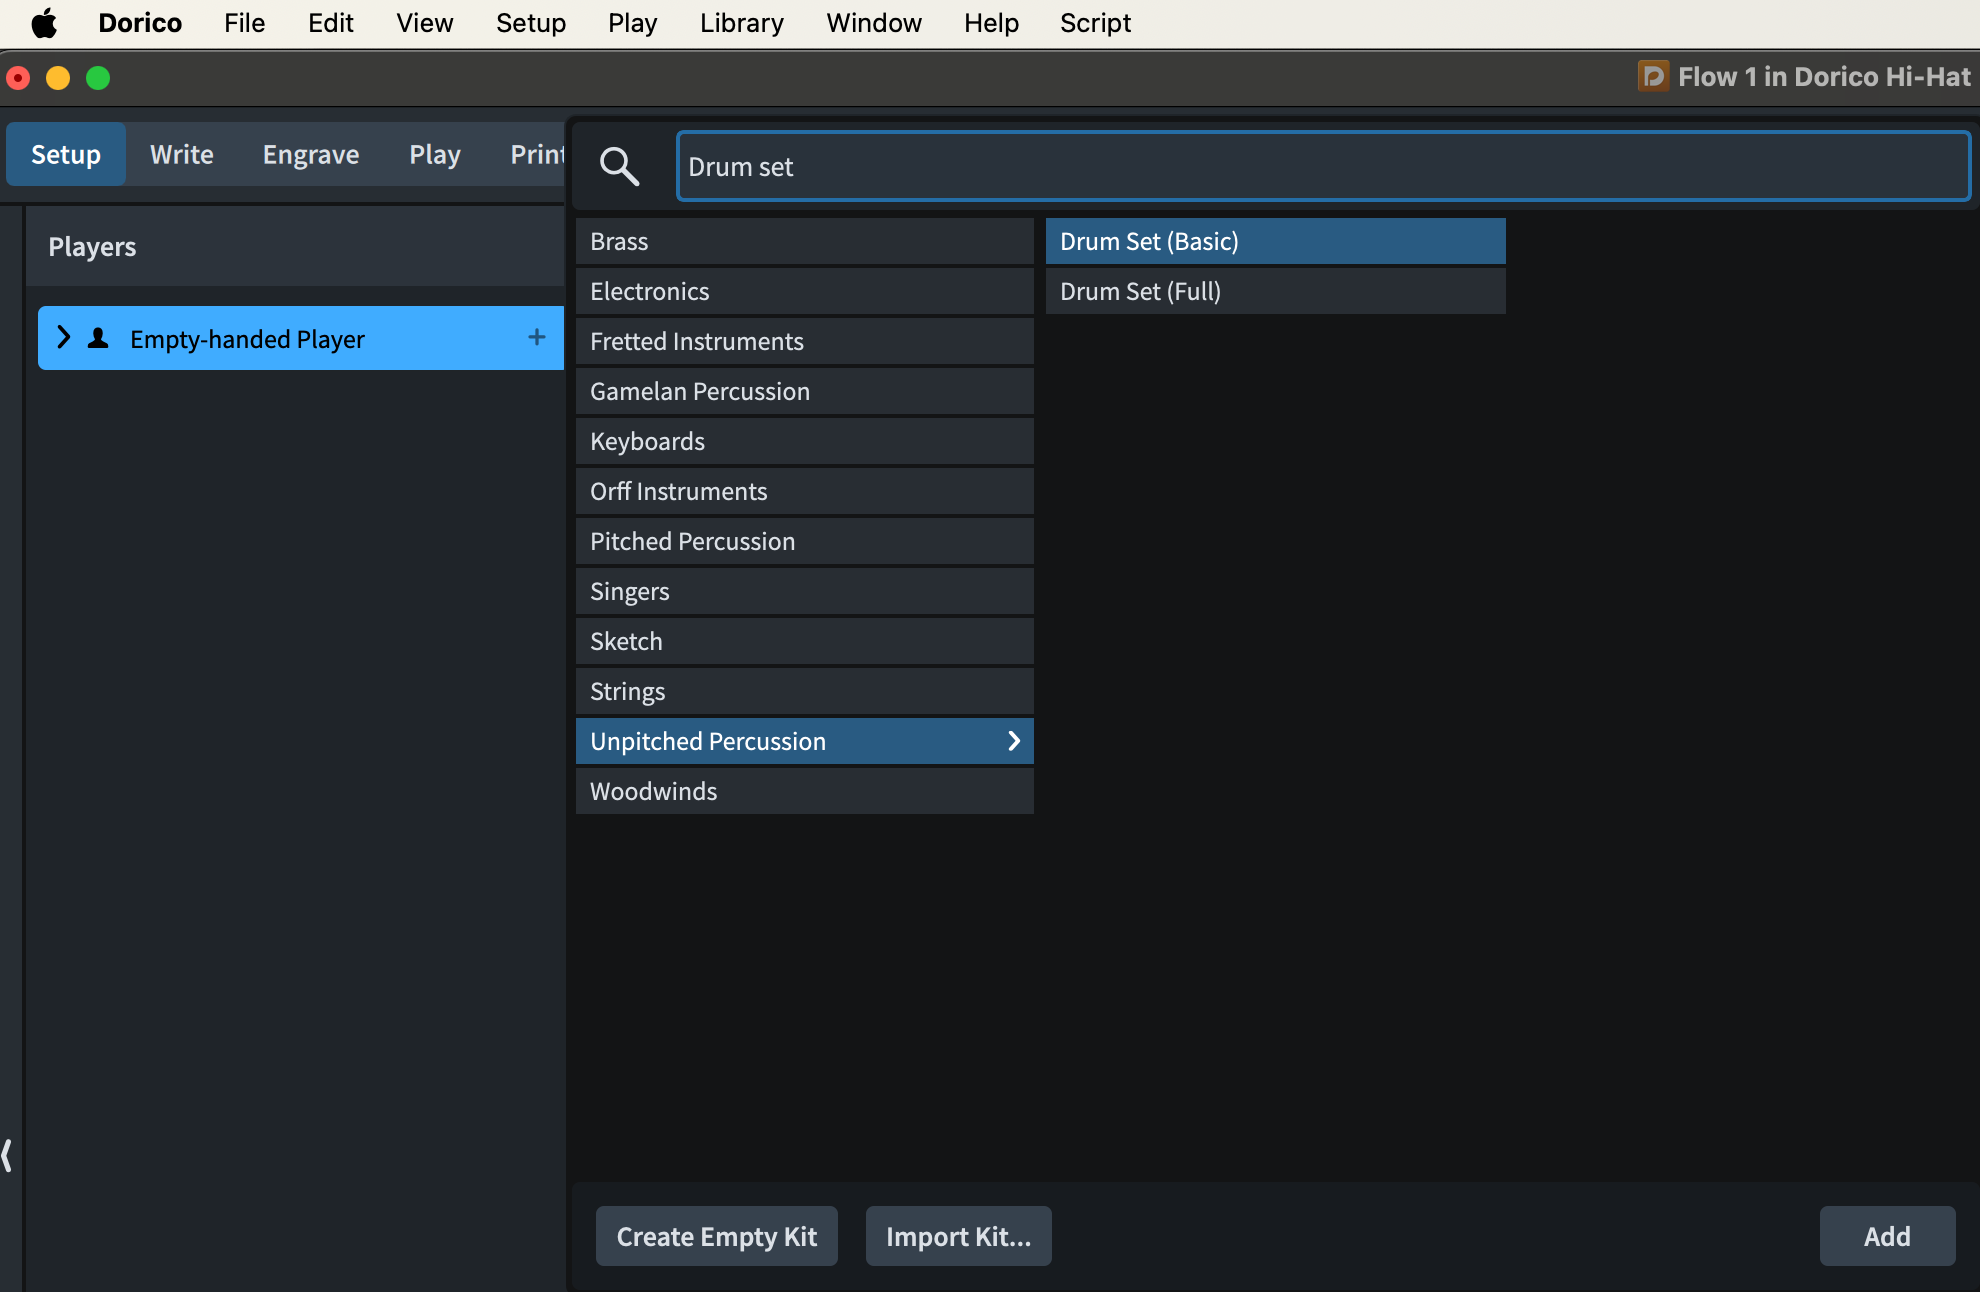
Understanding the Default Drum Kit Layout
Dorico automatically places percussion instruments on specific staff positions.
You can view these placements in the percussion kit editor.
- In the Players panel, expand the player
- Click the Settings icon
- Choose Edit Percussion Kit
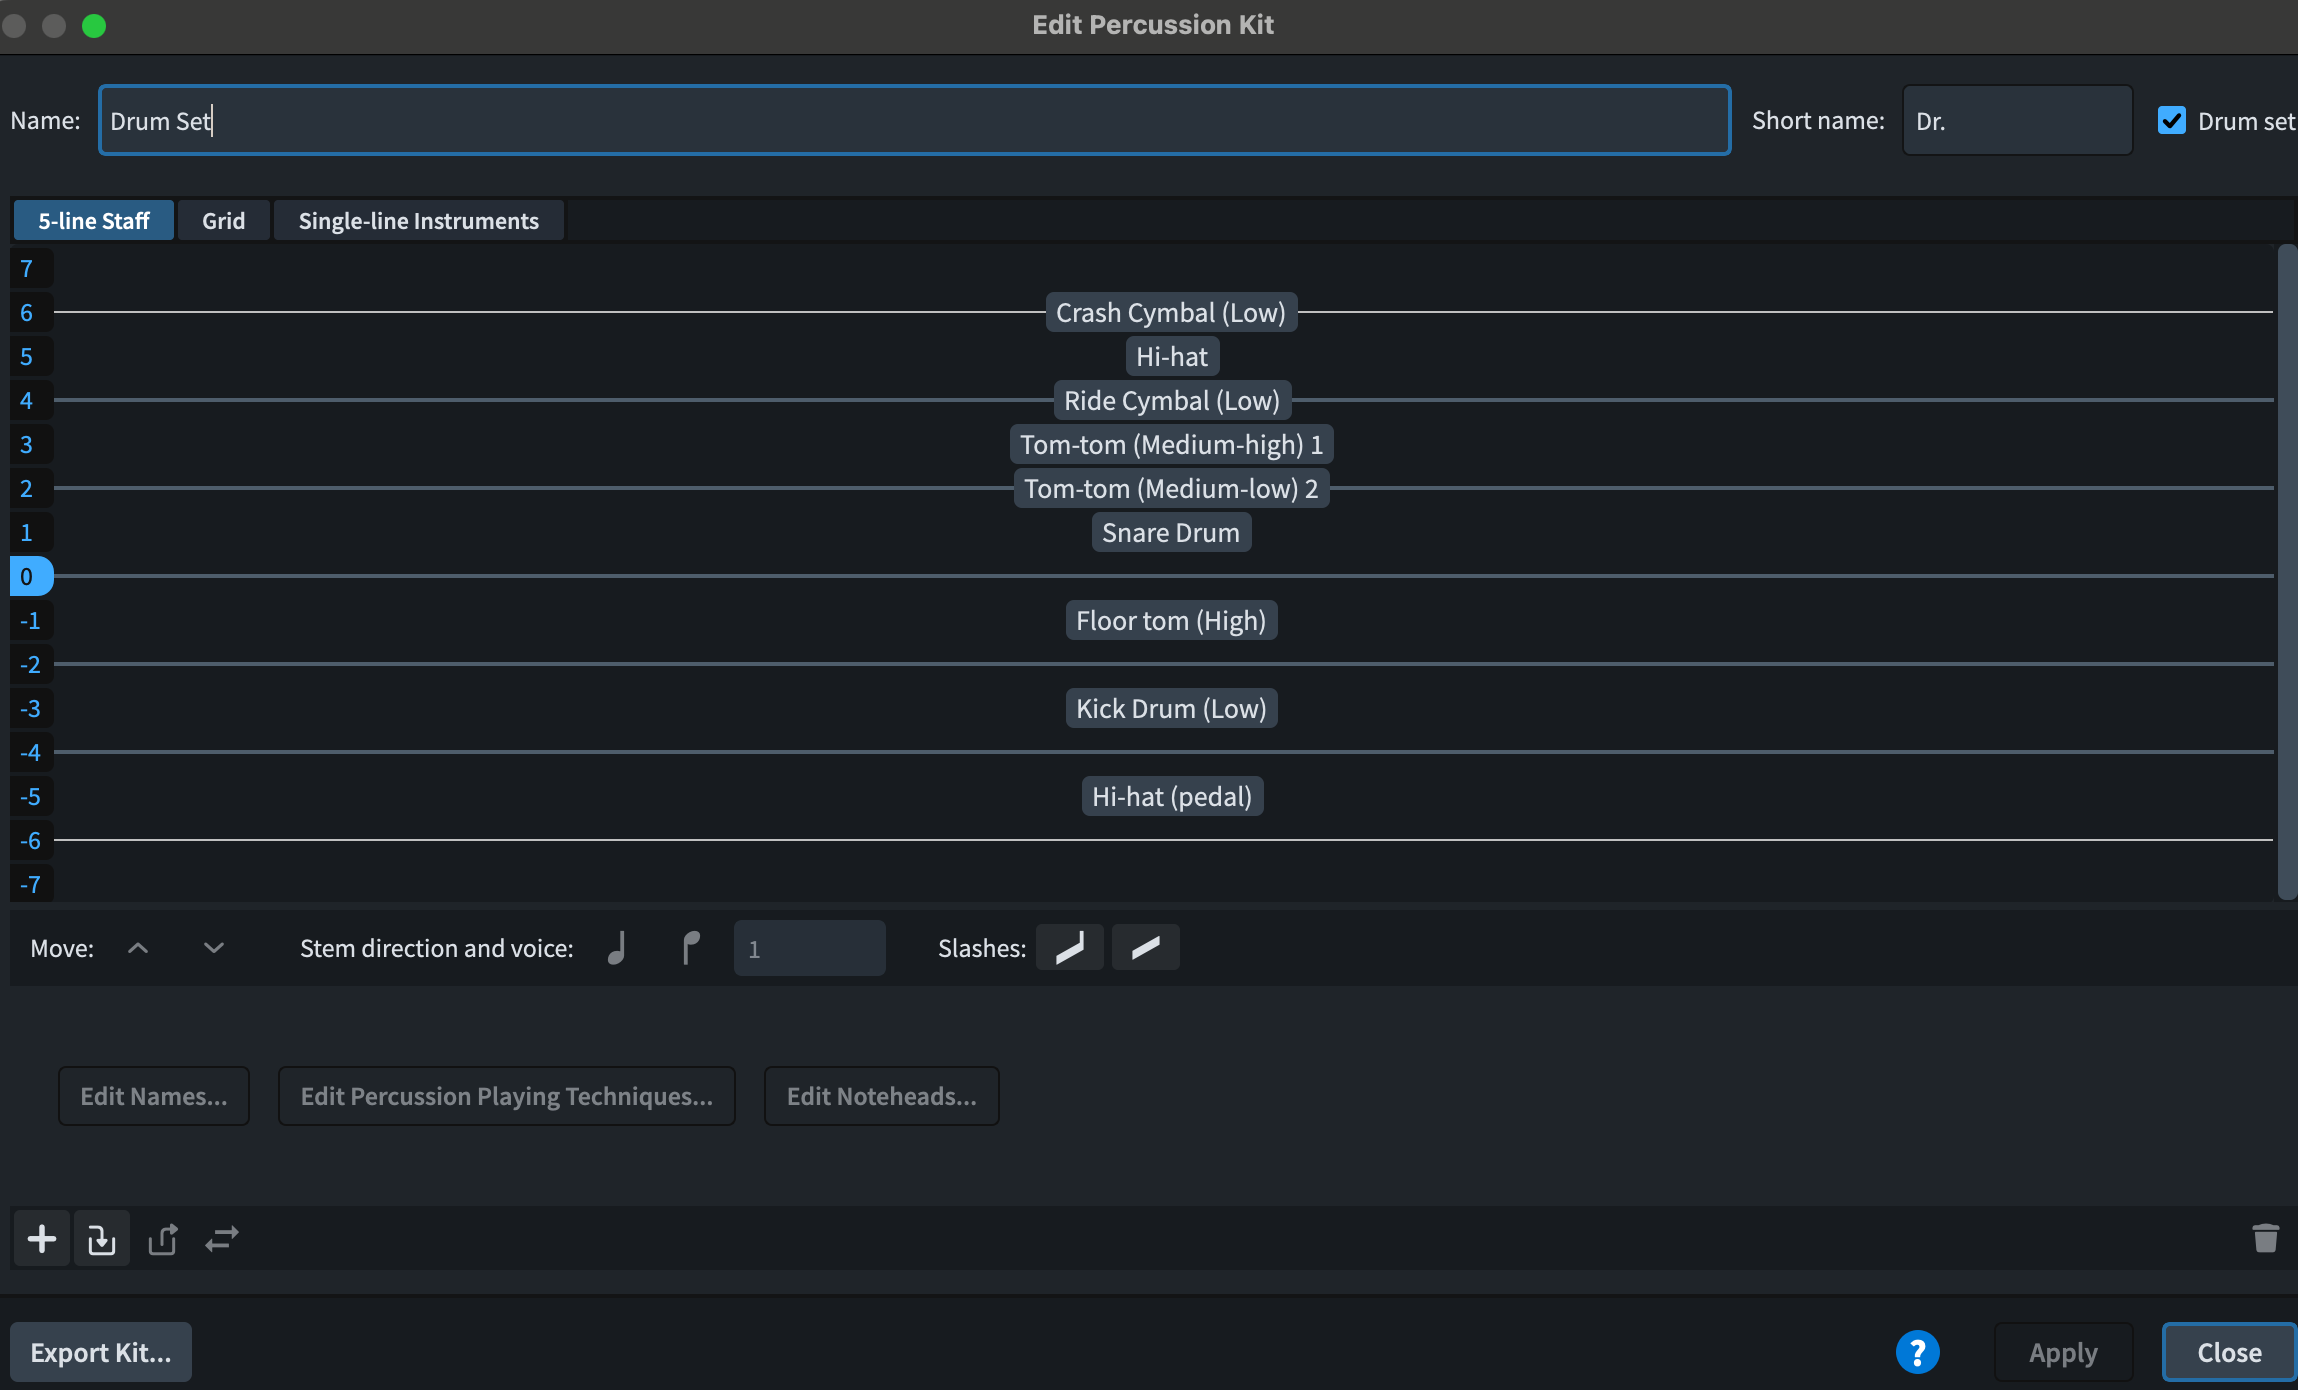
In the editor:
• The darker lines represent the treble staff lines (E G B D F)
• The lighter lines represent ledger lines
By default:
• Crash cymbal appears on a ledger line above the staff
• Hi-hat played with sticks appears on the space above the staff
• Pedal hi-hat appears on the space below the staff
Stem directions are also predefined:
• Hi-hat stems point upward
• Pedal hi-hat stems point downward
These settings can be adjusted, but the default layout follows common drum notation practices.
Entering Hi-Hat Notes
To enter hi-hat notes:
- Switch to Write mode
- Select the bar where you want to begin
- Start note input (Shift+N)
- Choose the rhythmic value (for example eighth notes)
- Use the up and down arrow keys to move to the correct staff position
Dorico will display the name of the instrument assigned to that position and you will hear its sound.
Press Y to enter the note.
Adding Closed and Open Hi-Hat Markings
Closed hi-hat is the default sound in Dorico. The plus sign is therefore only a visual indicator and does not change playback.
To add the plus symbol
- Select the note
- Open the Notations panel
- Choose Playing Techniques
- Make sure Unpitched Percussion is visible
- Click the plus symbol
To add the open hi-hat symbol
- Select the note
- In the same panel, locate the open circle symbol
- Click the symbol
This marking also triggers the correct open hi-hat playback sound.
Entering Pedal Hi-Hat
Pedal hi-hat appears below the staff.
To enter it:
- Select the note location
- Start note input if necessary
- Choose the rhythmic value
- Use the down arrow to move to the space below the staff
- Press Y
This allows pedal hi-hat to be combined with other sounds such as bass drum on the same beat.
Using Drum Pads for Faster Entry
Dorico also includes Drum Pads, which allow direct entry of percussion instruments.
To open them:
- Switch to Write mode
- Open the lower panel
- Click Drum Pads
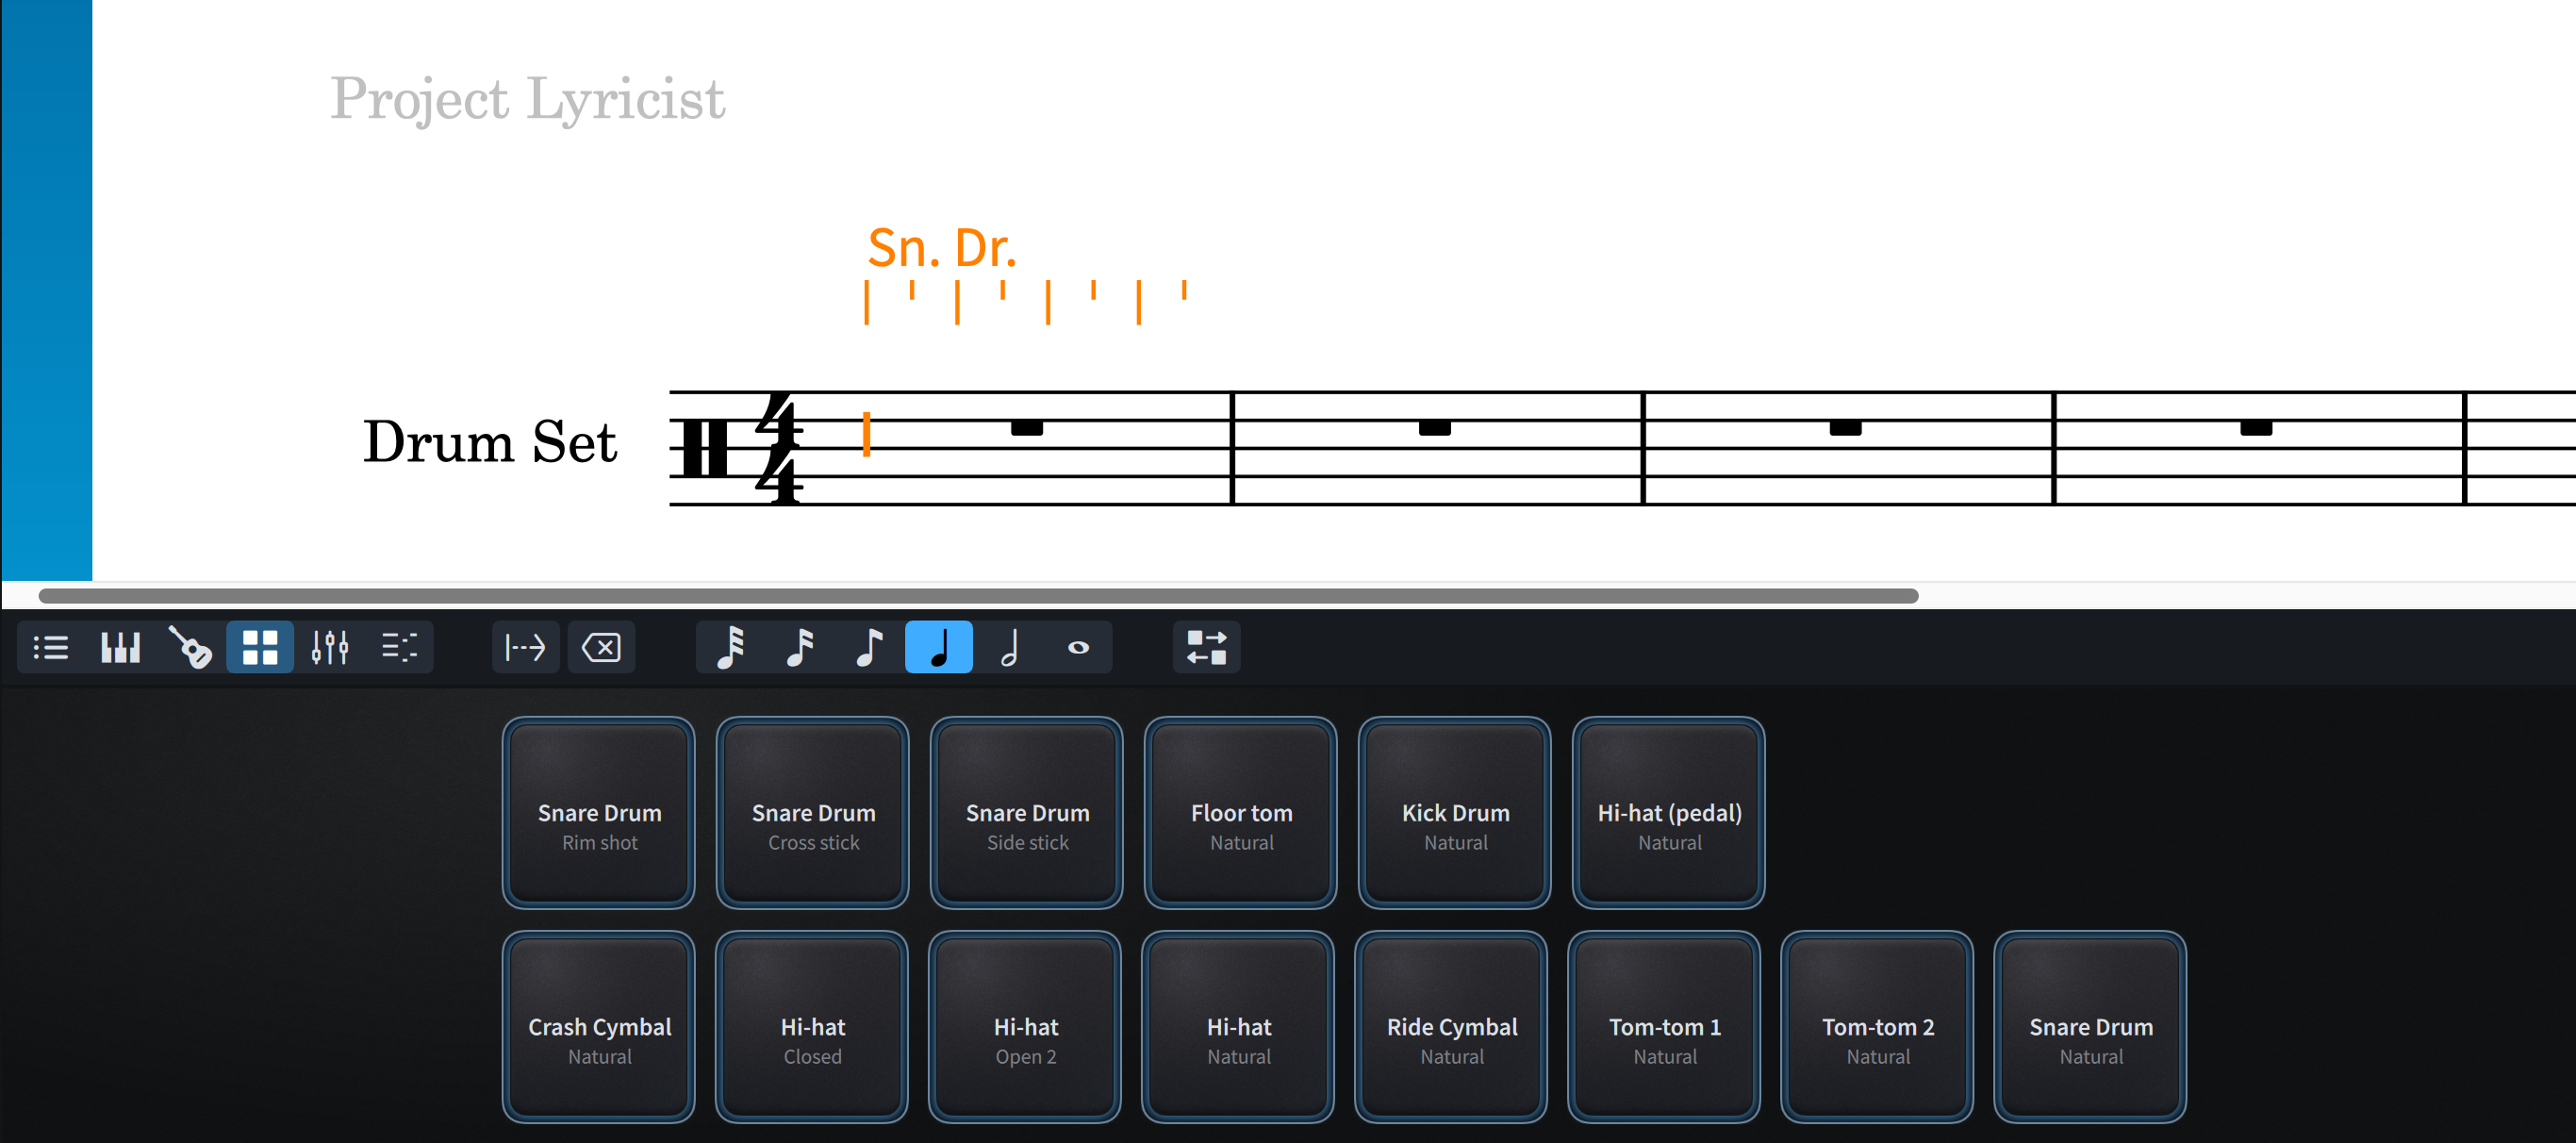
Each pad represents an instrument in the drum kit.
To enter notes:
- Choose the rhythmic value
- Click the desired drum pad
Dorico automatically adds the correct notation, playing technique, and playback sound.
Entering Notes with a MIDI Keyboard
If you are using a MIDI keyboard, you can also enter drum set notation directly.
Dorico treats the drum staff as a treble staff for MIDI input. When entering repeated rhythms with the same duration, you can simply play the notes on the MIDI keyboard instead of pressing Y repeatedly. For example:
• Notes played above middle C correspond to percussion positions in the kit
Using the Playing Techniques Popover
Playing techniques can also be entered using the popover.
First remove any existing playing techniques if necessary.
You can do this by selecting them and using the Select More command:
Shift+Command+A (Mac)
Shift+Control+A (Windows)
Then press Delete.
To enter the closed hi-hat plus sign
- Press Shift+=
- Press Return
This works in all versions of Dorico.
Entering open hi-hat with the popover
Typing the word open may display several different options because the word can apply to many instruments. Therefore, it is not the most efficient method. This is something that can be adjusted only with Dorico Pro.
Dorico Pro Popover Adjustment
Dorico Pro allows editing of playing techniques.
- Select the correct open hi-hat symbol from the Playing Techniques panel
- Click the pencil icon to edit it
- This opens Unpitched Percussion Playing Techniques
Here you can rename the technique to something like: open perc
After doing this, typing open in the popover will display the correct percussion option and playback will function properly.
This editing capability is available only in Dorico Pro.
Labeling Hi-Hat Positions with a Percussion Legend
Because drum set notation is not fully standardized, it is helpful to label X noteheads the first time they appear in a score.
You can do this using Percussion Legend text.
- Select the note
- Go to the Write menu
- Choose Create Text
- Select Percussion Legend
- Type hi-hat
Press Escape to finish.
Once a position has been labeled, it usually does not need to be labeled again later in the score.
Video Demonstration
The full step-by-step demonstration of these techniques is shown in the video below.
